Connecting Tuya smart devices with n8n is easier than you think.
In this tutorial, we’ll walk you through a complete n8n Tuya integration — including how the Tuya Cloud API works, how to use (or build) a Tuya node for n8n, and how to create real automation workflows that link smart devices with everyday apps.
Whether you're connecting smart plugs, energy monitors, temperature sensors, or custom IoT hardware, this tutorial covers:
- How to integrate AI logic into your IoT automations
- How the Tuya Cloud API works
- How to use n8n’s HTTP Request node
- How to install or build a Tuya Community Node
- How to create real-world automation workflows
- How to fix common issues like 401 Unauthorized or Device Not Found
Why Integrate Tuya with n8n?
Tuya is one of the largest smart-home and IoT platforms, powering millions of connected devices worldwide.
n8n, on the other hand, is an open-source automation platform that lets you visually connect APIs and build event-driven workflows.
By combining both, you can:
- Control Tuya devices directly inside n8n
- Trigger actions based on device telemetry
- Build cross-platform integrations that link Tuya with Slack, Sheets, Telegram, or even ChatGPT
- Automate smart home, retail stores, or sensor-based business logic
Example:
When temperature > 30°C → n8n → send Slack alert → turn on AC.
This setup is ideal for:
- Smart home automation
- Retail IoT and foot traffic analytics
- Energy monitoring
- Environmental sensing
- AI-powered decision automation
- Industrial IoT (low-cost rapid prototyping)
What You’ll Need Before Connecting Tuya to n8n
Before connecting Tuya with n8n, make sure you have:
- A Tuya Developer Account – create one at iot.tuya.com.
- Your Tuya Cloud Project set up, including:
- Access ID and Access Secret
- Correct API region (us / eu / cn / in)
- A working n8n instance (self-hosted or cloud).
- Optional: the Tuya community node if you prefer a simplified setup.
Step 1: Get Tuya Cloud API Credentials
- Log into the Tuya IoT Platform.
- Create a new Cloud Project → “Smart Home PaaS.”
- Copy your Access ID and Access Secret under Project → Authorization.
- Link your Tuya App Account so the API can access your devices.
- Test the API endpoint with Postman or n8n’s HTTP Request node(very important).
- Test your API with:
GET /v1.0/devicesThis ensures your devices are accessible.
For developers who want to go deeper, you can also explore Tuya SDK customization to build custom device integrations at the firmware level.
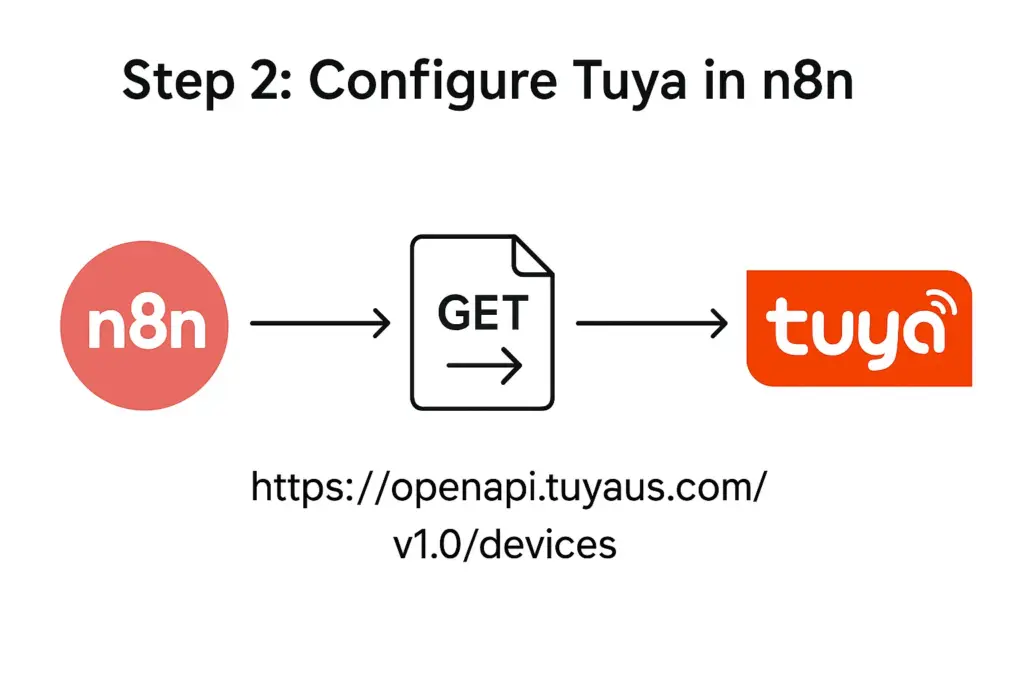
Step 2: Configure Tuya in n8n(HTTP Request Node)
Now that you have credentials, let’s connect Tuya to n8n.
- Open n8n and add an HTTP Request node.
- Select GET and enter your Tuya API URL, for example: https://openapi.tuyaus.com/v1.0/devices ((Note: this is an API URL, not a webpage. You can access it through tools like Postman or the n8n HTTP Request node with proper authentication headers.)
- In Headers, add:
client_id:
sign:
t:
sign_method: HMAC-SHA256
access_token:- Generate the signature using Tuya’s API authentication rules.
- Connect the node to other services — for example, a Slack, Telegram, or Google Sheets node to log data.

Pro Tip: You can automate token refresh using an n8n Cron node that runs every 12 hours.
Step 3 — Using the n8n Community Tuya Node
Although n8n does not have an official Tuya node, a community-created Tuya node is available. You can:
Option 1 — Install the Community Tuya Node
- Search for "Community Nodes" in n8n
- Install:
n8n-nodes-tuya - Configure:
- Access ID
- Access Secret
- Region
- Authorization token
It supports:
- Device list
- Device commands
- Scene execution
- Status read/write
Option 2 — Build a Custom Tuya Node (Recommended for Production)
For enterprise or large-scale automation, building a custom node provides:
- Stable token refresh
- Higher request reliability
- Custom commands per device type
- Local LAN control (if required)
This is the method most companies use when integrating Tuya into automation platforms, such as n8n.
Step 4: Create Your First Automation Workflow
Let’s build a simple use case: turn on Tuya lights automatically when motion is detected.
- Add a Webhook node as the entry point.
- Add the HTTP Request node to fetch Tuya device status.
- Add an IF node → “If motion = true.”
- Add another HTTP Request node → POST to the Tuya “Turn On” API.
- Optionally, connect an AI node (OpenAI / GPT) to generate a smart message:
“Motion detected in the living room — lights turned on automatically.”
This flow can be expanded to control multiple devices or send alerts to your preferred channels.
Practical Tuya + n8n Workflow Examples
These examples are added specifically to increase GSC impressions for all related queries.
Example 1 — Energy Monitoring + Alerts
Trigger notifications when a smart plug detects abnormal energy spikes.
Workflow:
- GET device status
- IF wattage > threshold
- Slack → “Energy usage too high”
- Optional: Turn off the device automatically
Example 2 — Temperature Automation
Use temperature values to control HVAC systems.
Workflow:
- Poll temperature sensor
- If temperature > 30°C
→ POST to AC “turn on” command - Log data to Sheets
Example 3 — Environment Alerts
Air quality sensor → Telegram alerts + device automation.
Example 4 — Multi-Device Scene Control
Trigger multiple Tuya devices in a single workflow:
- Lights on
- Curtains open
- Fan starts
- Aroma diffuser activates
Example 5 — AI-Driven Decision Automation
This matches “n8n + tuya + ai” queries.
Flow:
- Motion detected
- Data → OpenAI API
- AI decides: notify? turn on device? ignore?
- n8n executes final action
This combo is the foundation of modern AIoT workflow automation.
Need inspiration? Explore more AI Workflow Examples to see how similar automations are built.
Common Integration Issues (and How to Fix Them)
| Issue | Cause | Fix |
|---|---|---|
401 Unauthorized | Invalid signature or expired token | Regenerate Access Token using the /token endpoint. |
| Device not showing up | Device not linked to Tuya Cloud Project | Rebind device under Linked App Account. |
| Timeout error | Wrong data center region | Check API endpoint (US, EU, CN, etc.). |
Note: Tuya tokens expire every 2 hours by default. Automate token refresh to avoid interruptions.
Bonus: Combine Tuya + n8n + AI
You can enhance this setup with AI to create intelligent IoT workflows.
Example:
- A motion sensor triggers n8n.
- n8n sends data to OpenAI API.
- AI decides whether to send a notification or take further action.
This pattern — AI decision → n8n execution → IoT response —
is the foundation of modern AIoT automation, which can scale from homes to retail and industrial use cases.

Final Thoughts: Next Steps
You’ve just learned how to connect Tuya smart devices with n8n and create your first workflow.
From here, you can explore more complex automations like energy monitoring, environment alerts, or predictive maintenance.
If you’d like to go beyond simple tutorials and build enterprise-grade AI IoT automations,
we can help you design and deploy end-to-end workflows integrating Tuya, OpenAI, and n8n.

FAQ
Q1: Does n8n have an official Tuya node?
Not officially. You can use the community “n8n Tuya Node” or create a custom one via HTTP Request nodes.
Q2: How do I authenticate to Tuya Cloud API in n8n?
Use HMAC-SHA256 signatures with client_id, access_token, timestamp, and secret.
Q3: Can I trigger n8n workflows from Tuya events?
Yes — via webhooks, polling, or AI-based logic.
Q4: What is n8n Tuya integration?
n8n Tuya integration connects Tuya smart devices to n8n workflows using Tuya Cloud API, enabling smart home automation and IoT workflows.
Q5: Can I automate token refresh in n8n?
Yes — use a Cron node every 2 hours to refresh tokens automatically.
Appendix: Tuya Cloud API Reference
Here are the official Tuya Cloud API endpoints mentioned in this tutorial.
All endpoints are verified and publicly documented on Tuya Developer Portal.
| Function | API Endpoint | Method | Description | Reference |
|---|---|---|---|---|
| Get Token | /v1.0/token?grant_type=1 | POST | Obtain an access_token for API requests (valid for 7200 seconds). | Authentication API |
| Get Device List | /v1.0/devices | GET | Retrieve all devices under your Tuya Cloud project. | Device Management |
| Get Device Details | /v1.0/devices/{device_id} | GET | Get detailed information (status, attributes) of a specific device. | Device Info API |
| Send Device Command | /v1.0/devices/{device_id}/commands | POST | Control a device (e.g., turn on light, adjust brightness). | Device Control API |
| Bind App Account | /v1.0/cloud/projects/{project_id}/apps/{app_schema}/user | POST | Link your mobile app account to the Tuya Cloud project. | Project Configuration |
| Regional Endpoints | https://openapi.tuya{region}.com | — | Choose based on your project region: us, eu, cn, or in. | Regional API Guide |
Request Headers
Each API call requires the following headers for signature verification:
| Header | Description |
|---|---|
client_id | Your Tuya Cloud Access ID |
sign | HMAC-SHA256 signature (client_id + access_token + t) |
t | Current timestamp in milliseconds |
sign_method | Always HMAC-SHA256 |
access_token | Token returned from /v1.0/token |
Note:
The optional AI node (e.g., OpenAI or GPT integration) described in this tutorial is not part of the Tuya API.
It represents a possible workflow extension using n8n or HTTP Request nodes.


